


You guys!! I can’t wait to show you our new kitchen. The tile. The pendant lighting. Our new peninsula! I’ve been waiting TWELVE YEARS for this kitchen, and now that it’s here, I’m in love. We just put our house back together over the weekend, and it’s been like walking through a dream all week. I’m already enjoying spreading out on the new countertops for my WFH days, and creating some (non-instant pot) dinners on the new range.
From Island to Peninsula
The biggest change is the layout: before, we had this measly kitchen island stuck right in the middle of our workspace. There wasn’t really enough counter space to be helpful, and it only ever felt like it was in the way. Now that we’ve removed it, there’s so much more LIGHT in the space! It’s crazy how one little island cast such a big shadow!

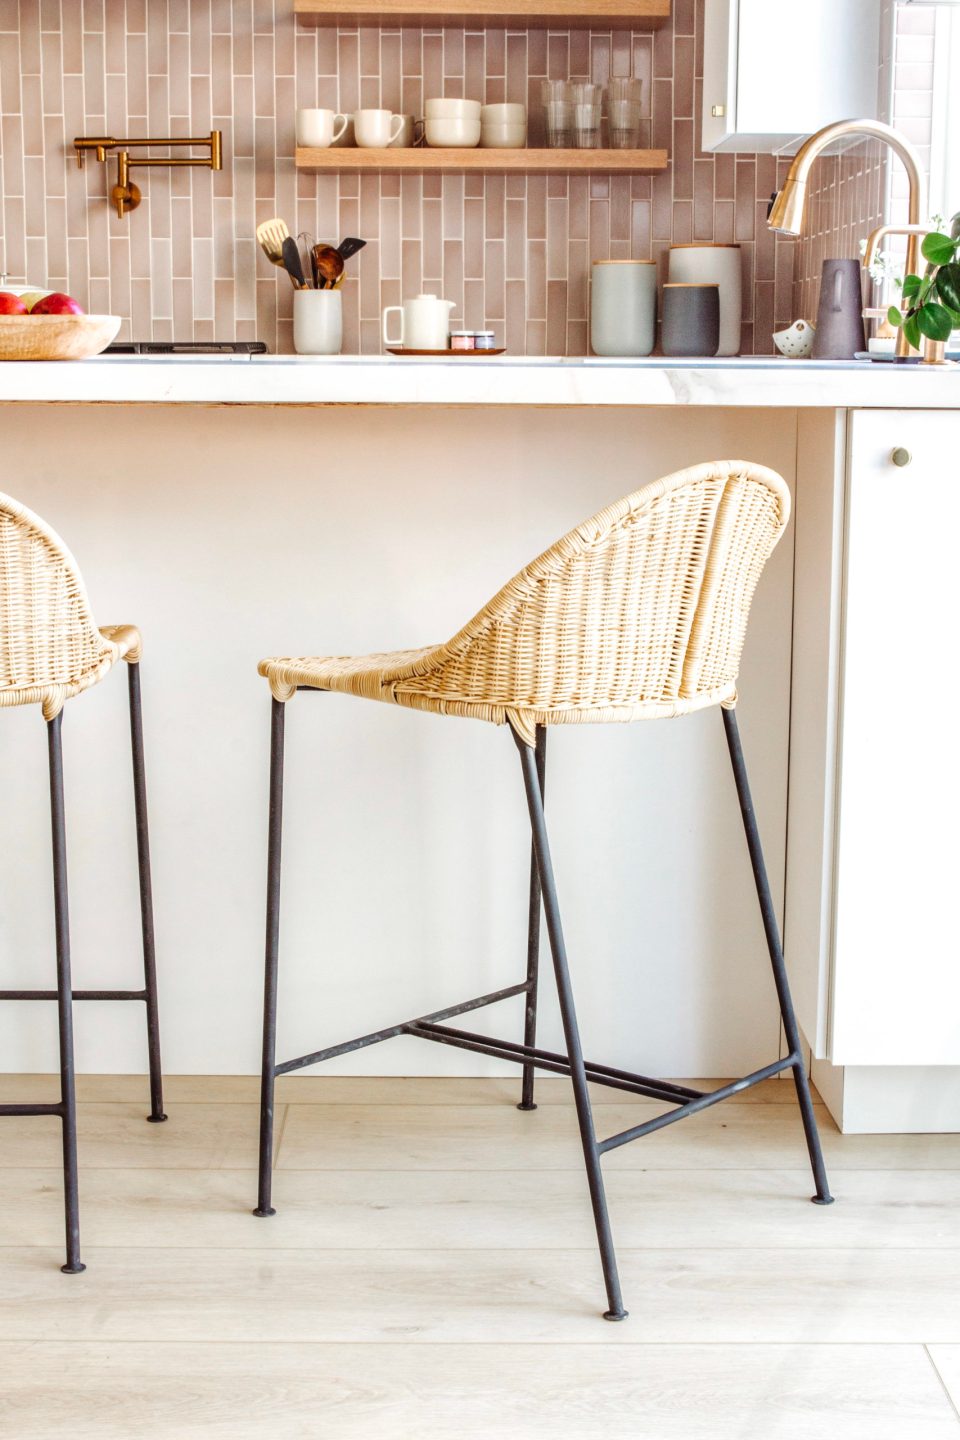
In lieu of the island, we moved our dishwasher to the other side of the sink and built out a peninsula with a waterfall countertop. The peninsula is 1.5x bigger than our old island, and gives us waaay more functional cabinet & counter space! It also provides some additional seating, care of these cute rattan stools from CB2. Now more of us can hang out in the kitchen without hovering in the workspace. Talk about a relational win!

Plus, it’s where I LOVE setting up to get through my to-do list while Travis gets some solo-time in our home office. Last year I talked a lot about the unexpected learning curve that WFH life presented. Maybe you’ll remember—I used to take calls in my walk in closet! 😂 I’m still using my WFH tote to keep my workspace contained, but now I’ve finally found the spot where I can really get in-the-zone. It feels so great to get down to business in this light, bright new space!
Our Pendant Lighting
Thanks to some beautiful pendant lighting, this kitchen is filled with light at night, too! When it came to choosing pendant lighting, I knew we’d go with Rejuvenation. They’re the true-blue PNW brand I grew up with, based out of Portland, OR. I love their style: timeless classics for a modern era. The quality is exceptional, and all my clients love them. Rejuvenation is just a good, all-American company!
When browsing their collections, I was originally drawn to their Cedar Moss Globe Pendants. I quickly realized how much they’re used—these custom pieces were booked out farther than my renovation!

I still love that round feature, because there are so many rectangular lines in the kitchen, from the subway tile to the modular cabinets. I knew I wanted a softer shape to balance them, and went with the Oswego 12” Clear Dome Pendants. I’m so glad that we went with the clear ones, because they allow the tile to shine through!
Meanwhile, above the shelves, we have the Crawford Single Wall Sconce. I tend to see a lot of articulating sconces over shelving, but I really liked these smaller options without the arm: they’re so cute! I think the size is just-right, especially because they have such a presence in the brass finish. There’s a density and a presence to them that I would have missed with a more spidery arm.

Hanging Pendant Lighting
Typically, pendant lighting is hung in thirds over a peninsula, island, or table. Whether you’re hanging two pendants or more, the rules are the same. You want the farthest pendants to be equidistant from the edges of your base, with about 30” clearance between each of them, and 30-32” from the counter to the bottom of the light.
To figure out where we wanted to place our pendants, we first drew out the peninsula in its actual-size on the cement floor. Of course we did it all over again after the cabinets came in. Since we have a cabinet door right here, we didn’t want it to swing open and smack into one of our lights!

I also wanted the pendants & the sconces offset, so when I look at the whole kitchen, I can see all of these lighting features. You want to space out your design so it feels balanced! If our pendant lighting overlapped visually with our sconces, you wouldn’t really see the full impact of either feature.
Heads up: lighting placement requires MATH.
So you have to know math—or you need to know someone who knows math! Even between Travis & I, we still got it wrong, and we had to move the J-box over 3 inches in the end. Whoops. At the end of the day, you’re never sure.
To be honest, I could have gone a bit bigger. The trend today is oversized pendant lighting. Big globe lights have a grand feeling to them, a visual trick to expand the space. Remember the dinky little pendants of the nineties? They actually made our spaces feel small! Because of our cabinets, I went with 12”, but without restriction I easily could’ve gone up to 15”—even 18” !

Coordinating Hardware with Pendant Lighting
I like to think of the pendant lighting and hardware as the jewelry of a room. They’re what really make a space feel finished! If you’re a design conservative, this is where you can add a little wink. 😉 Afraid of color? Metal finishes are a great way to add a little personality or visual interest in a way that isn’t threatening.
If you’re overwhelmed by choice, then your jewelry preferences actually offer a great comparison: consider the kind of bling you like when dressing! Do you prefer statement jewelry, or classic tiffany diamond? Whatever your preference, let it shine!

Of course, I’m definitely not afraid of color! For those who like to feel on-trend, brass and matte black are super cool right now. My selected Bowman cabinet knobs & drawer pulls (also from Rejuvenation) come in both! Satin & brushed finishes offer a softer version of the brass and chrome, and you can take it as soft as you want.
The jewelry comparison offers us another perspective on mixing metals. It’s really a matter of what you’re comfortable with. You’ll notice not all of my brass finishes are exactly the same. All the Rejuvenation pieces are ‘aged brass,’ but the appliances are almost coppery, and my Lenta Delta faucet bridges the gap with their ‘champagne bronze’ finish.

While I would necessarily mix chrome and brass, I don’t need to be matchy-matchy… so I’m fine with it! In real life, not everything matches—especially between different brands. Depending on how you might approach it, mixing metals could be really cool! It depends on your aesthetic and the overall appearance of your finishes together.
Pro tip: order all your lighting hardware ahead of time to see them together.
If you wait till the last minute, you don’t have time to switch it out with something that works better with your scheme!
As far as rules for installing hardware, Travis and I did a lot of research here. We discovered that at the end of the day, it’s totally down to personal preference! Most guides say to go 1” down and 1.5” inward from the corner of the cabinet door, but we went with 2”. I guess we were feeling a little bit risky!

Whatever perfect combination you choose, the goal is to be consistent across applications. There’s a guide you can buy at Home Depot, and I’ve been using it forever—but I might make my own for you guys to download, what do you think? Maybe I’ll even design it from my new kitchen peninsula, under the glow of my new pendant lighting! I can’t wait to see all the good ideas I come up with, here.
Happy day!
Anita


+ show Comments
- Hide Comments
add a comment