


Wow! You guys have been obsessed with the latest DIY Beadboard wall! Trav and I are pretty exhausted but also SO proud of ourselves! Main reason? We brought my mom’s 1989 mauve powder room into 2020! What began as a small facelift turned into something epic. Let’s dive into all the deets!
The “Before” and “Why”
As you know with the Anita Yokota Method® whenever you start a refresh or renovation, the key to success is finding your interpersonal reason for the project. For me, I wanted to give back to my mom in a practical and pretty manner. I live far from her and she has worked so hard for me and my sister. My hope was that every time she or a guest used the space, she felt some kind of connection with me. This was a true labor of love.
In addition, my Why is to improve the mood of everyone who visits and uses the powder room. The worst is using a dysfunctional and dated bathroom. Whether you’re the host or guest, your goal is to feel comfortable so that you can relax and get to know each other better. The powder room is the only bathroom downstairs so you can imagine how integral this room is for my family!
Truth be told, the mauve toilet wasn’t flushing properly anymore and the vanity sconces were too small for the large mirror. In addition, the cherry-stained vanity and black granite were too dark. It just didn’t feel inviting.
Here is a video tour of what the bathroom previously looked like.
DIY Beadboard Wall Paneling
Just like the master bedroom board and batten, I wanted this room to have an architectural interest. Except there was one problem. We were only in Seattle for two weeks tops. And we wanted time to spend with family. Balance is key!
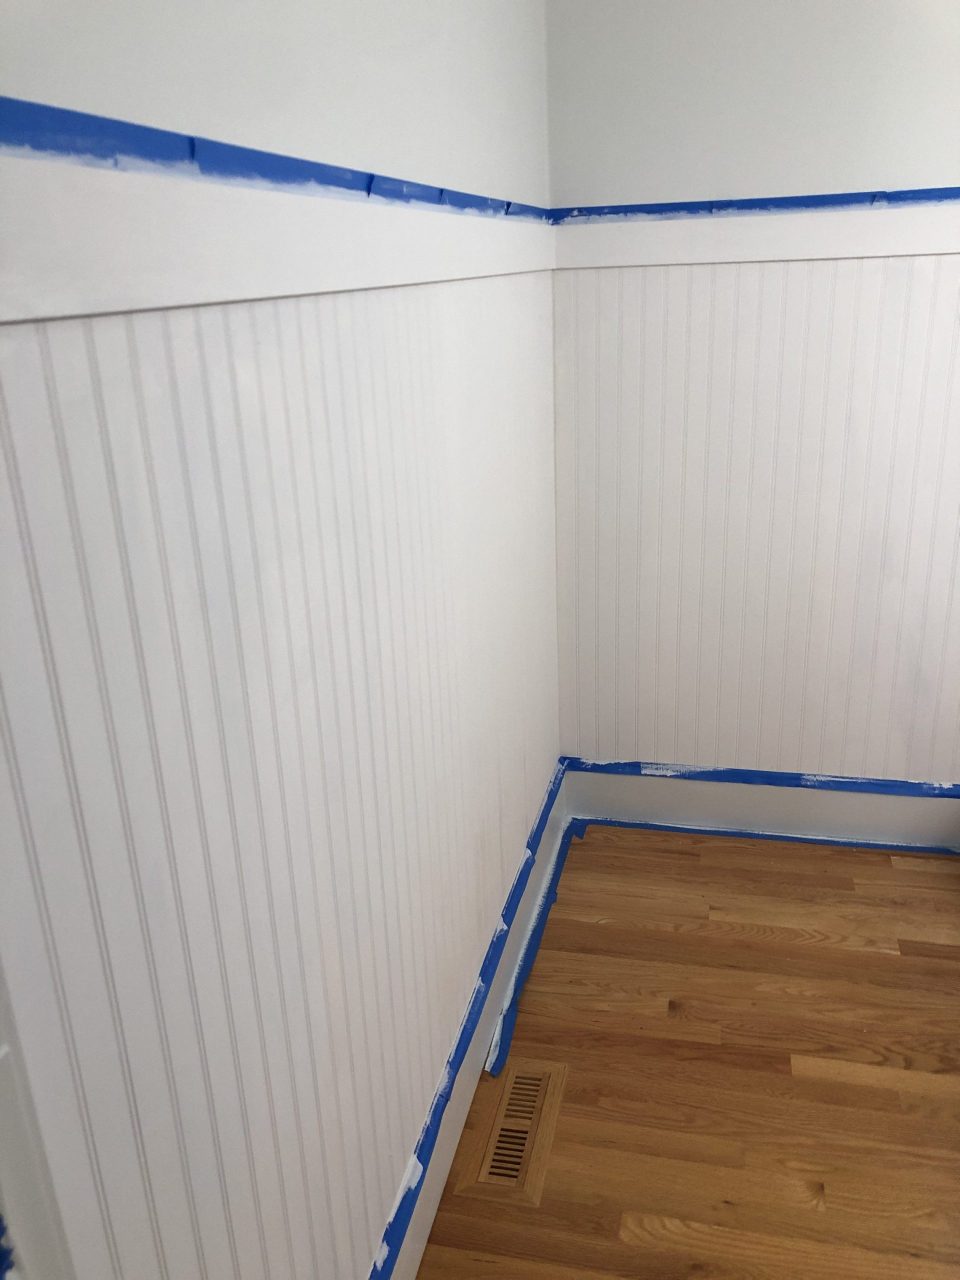
So we decided to try beadboard as it was one large panel and we assumed measurements would be at a minimum. Compared to board and batten, this assumption is correct! So if you want to add architectural interest but for whatever reason don’t want to measure much, then beadboard is a great introduction to the DIY world of wall paneling. And the cost is extremely affordable. We only needed to use one panel and a half. One panel was $22 at The Home Depot. Yep, that was the only materials cost to this DIY besides paint!

Our Beadboard Paint Colors
It’s been beyond fun to design this bathroom with your input! The most popular IG story hands down was when I asked you which blue to use for the beadboard. There was a record-breaking amount of you who participated by viewing and voting! What was really interesting was that your preferences were the same as mine! What a cool tribe I have. I’m so lucky to have you all.

The four we considered were the following:

Ultimately, my mom chose Sherwin Williams Smoky Blue! She is an artist and I knew right away she made the best choice. It is dark and sexy but bright enough to stand out in a darker space. After all, this bathroom only has one window in the corner. And don’t forget, in Seattle, natural bright sunlight is a commodity!
Another important paint chose was the white paint for the rest of the walls and trim! I have made Sherwin Williams Extra white and Pure White my go-to for countless clients and my own projects. But there are soooo many whites out there worth trying.
So this time around, I decided to explore the wonderful world of white paint. I wanted something still bright with little tint and almost no undertones. If there were to be undertone, I would want something like green or blue to pick up on the smoky blue.
Spare white was my solution. It was really bright and white but slightly softer and not as bold as Extra White. Extra white is very in your face white. This bathroom had traditional trim and cabinetry, so I didn’t want anything too modern white. I was looking for a warmer white without it being too dingy or creamy.
Spare white does have slight green/blue undertones and that was perfect with the Smoky Blue! Look at spare white here. Can you tell it’s richer than a bold extra white with no tint?

Image credit: danksandhoney.com

I hope you can see the difference. The Extra White in my family room is very one tone bright white with lots of reflective light back to our retinas. Can you see what I mean? The Spare White is richer because it has undertones to give it depth.
After installing the beadboard, we primed the whole room and then painted the walls Spare White. I was so pleased to try out this new white. Now I can share additional white choices for you!

I was lucky that the bathroom already had 7 inch baseboards! It was a dream really. If only I had this in my own home. We also replaced the mauve toilet and brought in a fresh white Delta toilet that actually flushed. Woohoo! I was relieved my brother in law could help Travis carry the old toilet out.

Ahhh, fresh white paint and a new toilet. We also painted the vanity white as well. Initially, I tinkered with the idea of painting the vanity Smoky Blue. But I feared it was too dark. So glad I went with my design intuition! White was the way to go. Can you see how dark this room is? I shot this during the peak time the sun flowed in.
Now it was time to paint the beadboard Smoky Blue! My adrenalin was pumping through my veins like crazy!

We let the kids help us paint the larger areas of the beadboard. It was chaotic but so fun to do a great thing for Grandma! Thank god their attention span was short. Once they left, I painted like a maniac and go it done in no time.
Adding Vanity Lighting
Another great find through this project was affordable vanity lighting from Amazon Home! I wanted something slightly oversized because the mirror was so large. And the previous 3 light sconce was dinky and gave no light.

My mom didn’t want to spend too much because she rather go for a full renovation with adding a shower in someday.
Another reason why I couldn’t go higher end was that there were metal screws drilled into the left and right sides of the sconce. Usually, there is a circle in the middle housing all the electrical and holding the light up. But to my dismay, whoever installed this light in 1989 decided to drill into the mirror! UGHS.

I had a really hard time finding a great looking vanity light with a rectangular box. Most of the ones I found looked exactly like this one. I’m still flabbergasted these ones exist??
Another option was to just switch out the frosted glass shades. I went to a couple of big box stores and again, I was disappointed. All the shades were dated-looking! The good news is that the opening of the shade (about 2 1/4″) seemed to be standard. So if you want a refresh and find something you love, it probably would fit your sconce!
Enter this modern vanity light that usually could cost three times as much.

Image Credit: Amazon Home
When Travis first installed the light (yes! he’s learning to do plumbing and electrical all by himself!), my mom was like whoa! it’s big. Just as my client was scared of her oversized kitchen island pendants, once they let the light sit in the space for just an hour or so, they could literally…wait for it…see the light! You know I can’t resist saying a pun or too.

Isn’t the light gorgeous and much more proportional to the mirror wall?
It was only $100!!
We also replaced the old sink fixtures with this nice yet affordable Delta Lahara faucet. The brass matched the vanity light exactly!

As a designer, it’s always a bit nervewracking to make sure the fixtures match well. You can’t match 100% all the time but it’s best to make the effort. So if you love this look, then the Amazon light and Delta Brass fixture is the way to go for your next bathroom renovation or refresh! Lights and fixtures are the easiest way to refresh a bathroom.
Cabinet Hardware
My love for well designed cabinet hardware runs strong. I’m a high/low designer. So where I can save on things that aren’t a big priority then i will. But for some bling-bling and great design interest, paying a bit more for cabinet hardware is the best solution!
For this vanity, I didn’t want to do the standard modern sleek pulls we see time and time again. Believe me, I love it and will continue to use that look. But in here, the cabinets are traditional. So I wanted to elevate but not go too modern.
Rejuvenation seems to strike the balance well every time in marrying the old and new into something modern and classic.
I chose the Rigdon drawer pulls because it was classic with some knurling. And instead of knobs, I installed the drawers and doors with just drawer pulls. It made the vanity look more stately and cohesive because it was such a small space. I wanted the longer rectangle lines.

Image Credit: Rejuvenation
The wonderful thing about these brass pulls is that it will patina over time into that pretty aged brass look we all love.
The same goes with the Tolson towel ring.

You know why I loved this towel ring? The base plate reminded me of being on a old ship. The blue beadboard and brass metals reminds me of the East Coast Cape Cod feel. Do you feel it too?
Faux Marble Contact Paper
By far the most asked questions was the faux marble contact paper for the bathroom countertops! I mean, guys, SO MANY questions! The process is a bit long to explain. I want to set you up for success so I decided to make this a second post this week. I PROMISE I WILL GET IT TO YOU BY THIS WEEK! If you can’t wait, then head to my original blog post on this wonderful hack.

The Powder Room Reveal!
I know you’re dying to see the EPIC AFTER!!!
Well, here it is!

I know right? How crazy is this DIY transformation? I AM OBSESSED.
I really didn’t want to leave Seattle without taking this bathroom with me. But that’s not possible, so I’ll just stare at these beautiful pics.
Isn’t the Rejuvenation Skyline Rug incredible? I’ve always wanted this one. I got the yellow one for the master bathroom.
The rug was on sale too! I love it when the universe aligns everything perfectly. The flatweave rug is the best option for bathrooms and kitchen. They aren’t high pile where every drop of water absorbs and gets moldy.
Many of you ask me all the time how it is with a pretty rug in the bathroom. I can’t say one bad thing about it. I’m not sure if my family are just low splashers? But we really haven’t and water issues with rugs. Or maybe I just let perfection go and live authentically with the rug there. I much rather live with a rug I love than have a practical rug that is uninspiring. I have gone down that route before for years and you know what? So not worth it. Buy something you love that’s practical enough and use it!

Lawd this vanity is beautiful! You can’t even tell it used to be cherry red! Taking the time to sand and prime cabinets are essential to a successful transformation. Believe me, I used to get lazy about it many moons ago. Waste of my time even trying! Do it right, you will reap the rewards tenfold.
The towel ring and cabinet hardware were SO worth the splurge. Right now they are on sale so go grab some and get this look!

A set of fresh towels sure does the trick for our minds and bodies to rejuvenate in here!
The hooks are also something worth mentioning! When it comes to beadboard, hooks go hand in hand with it.
I bought 3 hooks and honestly, I plan to buy 3 more on the opposite wall. There is no shower here but to have hooks to let the hand towels dry or even have guests hang their jackets is a fine alternative. Because this bathroom is right off the laundry room side entry, I envision it as a mudroom.

Image Credit: Rejuvenation
Ok, here’s more glorious eye candy for you!

I have something so special to share with you! You see that oil painting? My mom painted that! My mom is an artist and she has lots of paintings lying around her art room upstairs. As I was thinking about what kind of art to put in this space, it dawned on me that I was sitting on a gold mine of art! I found this small oil painting and I just had to put it up on the top board ledge.
Isn’t it perfect?

Little details matter in bathrooms! I wanted to up the wellness factor in here big time. So I went with organic looking ceramics and vases with greenery. The frosted window provided enough privacy. So I added a cute hanging plant by the window to distract the eye from seeing just a bare window. Nice trick right?

Whew! Travis and I worked long hours on this DIY for my mom and it paid off in spades. Does this inspire you to add beadboard to your bathroom? It’s totally worth it! Next up a blog post on the faux marble contact paper! Then an additonal blog post on the hundreds of questions that were asked about this DIY. I promise that by the end of this DIY series, you will feel so confident to take on a DIY like this!
Happy day!
Anita


+ show Comments
- Hide Comments
add a comment